» "using FreeType to render fonts in Windows"
font antics
an unfortunate side effect of getting older is that my eyesight isn't getting any better. i'm definitely overdue for a new pair of glasses - and for me, the first sign usually starts here, on the computer screen.
but you don't have to have bad eyesight to understand my obsession with a nice, crisp font: if you've ever used an iMac, or some recent and snazzier linux distros like Pop! OS, returning to using a Windows machine will make it obvious: the way the operating system 'draws' fonts on the screen is subpar in comparison to other systems.
comparison
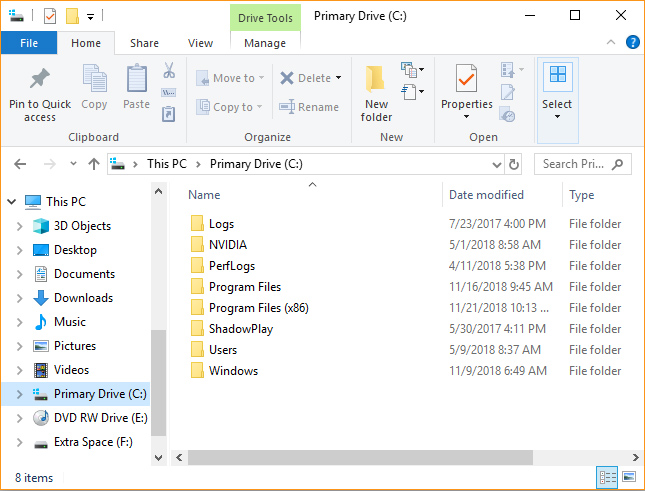
the following is how a typical Explorer window looks in Windows 10:
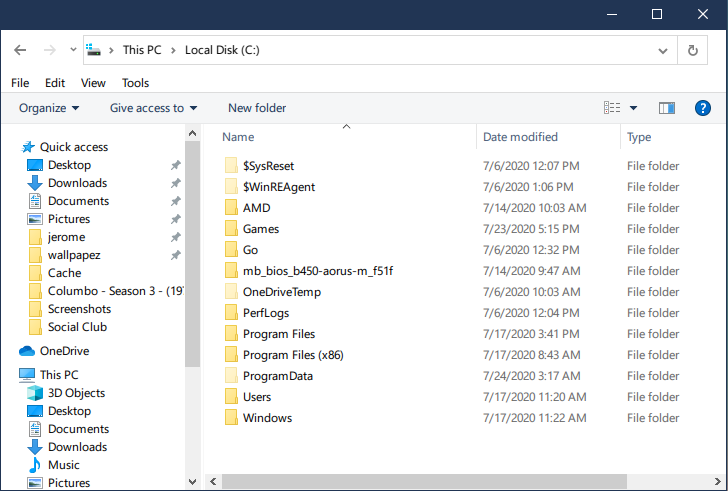
now, compare this to my own Explorer window, running MacType:
the solution
Before you proceed: Make sure you perform a system backup - for the following, all you will need at minimum is a quick System Restore Point.
MacType is a drop-in replacement for the native Windows font rendering. As you can imagine it is a pretty extensive overhaul, but the MacType installation will install a variety of tools to allow you to bring FreeType rendering to as much or as little of your Windows GUI as you'd like.
After installing, the main choice you will have to make is whether or not you'd like to do a full-blown, top-down replacement - or simply use it in a limited environment.
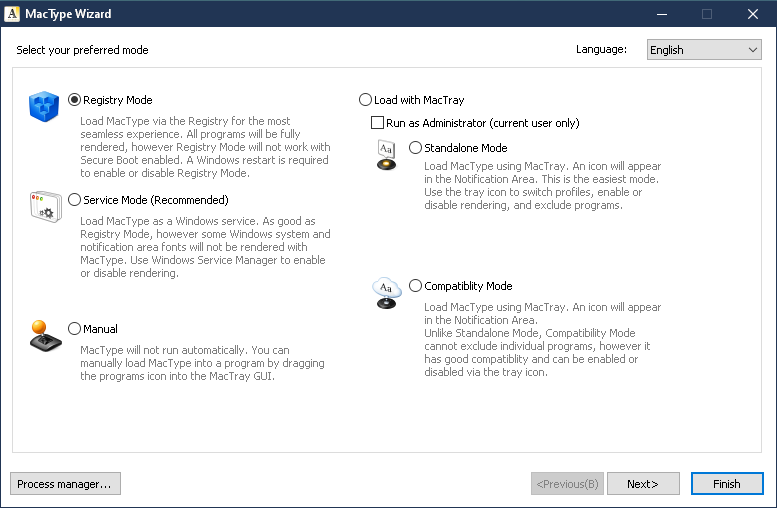
As you can see - plenty of options allowing for a nice amount of flexibility.
The big choice you will make will be whether or not you'd like MacType to also replace the System font rendering with the FreeType engine. As you can see from my screenshot, I went with the registry method of installation, for a complete integration. I haven't tried the other options, YMMV.
An important note: Before, or after installing MacType, you will want to go to your Font settings and disable ClearType! This should be fairly obvious - if left enabled, Windows will continue to re-draw your fonts even though FreeType has already drawn them. The result is fonts look a bit muddled.
After choosing the level of integration you'd like, you will then be brought to the rendering engine config selection.
One of the awesome advantages of the custom rendering engine is that it is open source - and therefore, widely configurable. This is outside the scope of this how-to, but it really isn't that important - because by default, the program ships with a very large variety of different configurations to choose from.
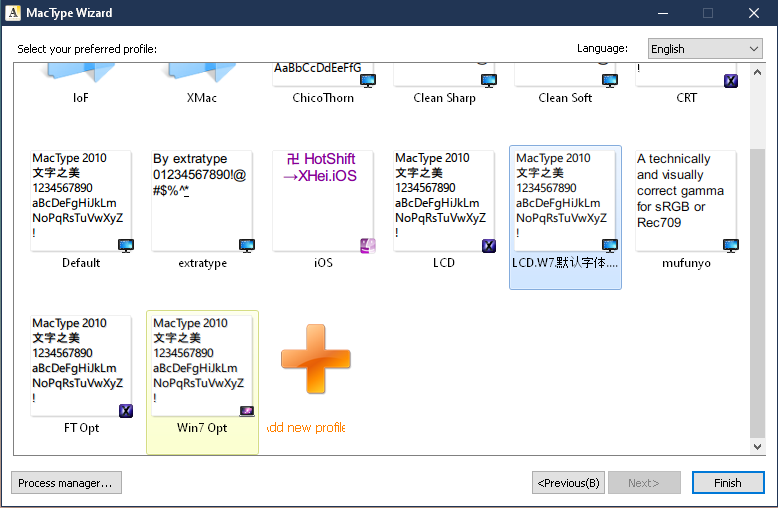
Personally, I have had the most luck with the "LCD.W7" configuration file. You might want to start easy though - and just see what the default settings do for ya.
This program is deceptively complex - lots of options, bells and whistles. But the above steps - install, integration selection, and config selection - are all you need to get going.
After you select your config and finish up with the wizard, you will want to log out and back in at a bare minimum - I always reboot just to be safe.
There you have it! When you log back in, you should be treated to a crisp, clean overhauled UI. There's still some other utilities that might be worth checking out if you're looking to fully replicate the way my Explorer window is set up (Classic-Shell and OldNewExplorer should be all you need).
Regardless of how many of these tools you wind up playing with, you'll definitely notice something I always strive for when doing UI customizing: when you're done you won't have any 'bloat' or otherwise cumbersome UI to deal with. MacType hides in the background, Classic Shell is a lightweight start menu / file explorer styling tool, and OldNewExplorer is a one-and-done config utility that doesn't even require much more after the initial setup - it's a portable app.